
Affiliate Disclosure: Some links on this page are affiliate links. As an Amazon Associate, we earn from qualifying purchases — at no extra cost to you. We do not buy, install, or physically handle the cameras we cover; our rankings come from aggregated owner reviews, ratings and expert consensus. Commissions never change our verdicts. We're reader-supported: commissions fund hosting, research and updates, so if a guide helped, buying through our links keeps it going. How we rank · full disclosure.
Short version: learning how to install a security camera comes down to four decisions and about thirty minutes of work. Choose the position for face height rather than for the best view. Confirm the power source and the WiFi signal at that exact spot before anything is drilled. Seal the cable entry properly. Then set up the software side — activity zones and notification settings — because a camera that alerts on every passing car gets muted within a month, and a muted camera is decoration.
This guide covers the physical job for every power type: battery, plug-in wired, PoE and solar. It does not cover which camera to buy — that decision comes first, and it starts at our buying guides hub.
In Plain English
Putting up a security camera takes about thirty minutes once you have made four decisions: where it goes, how it gets power, whether the Wi-Fi reaches, and how to keep rain out.
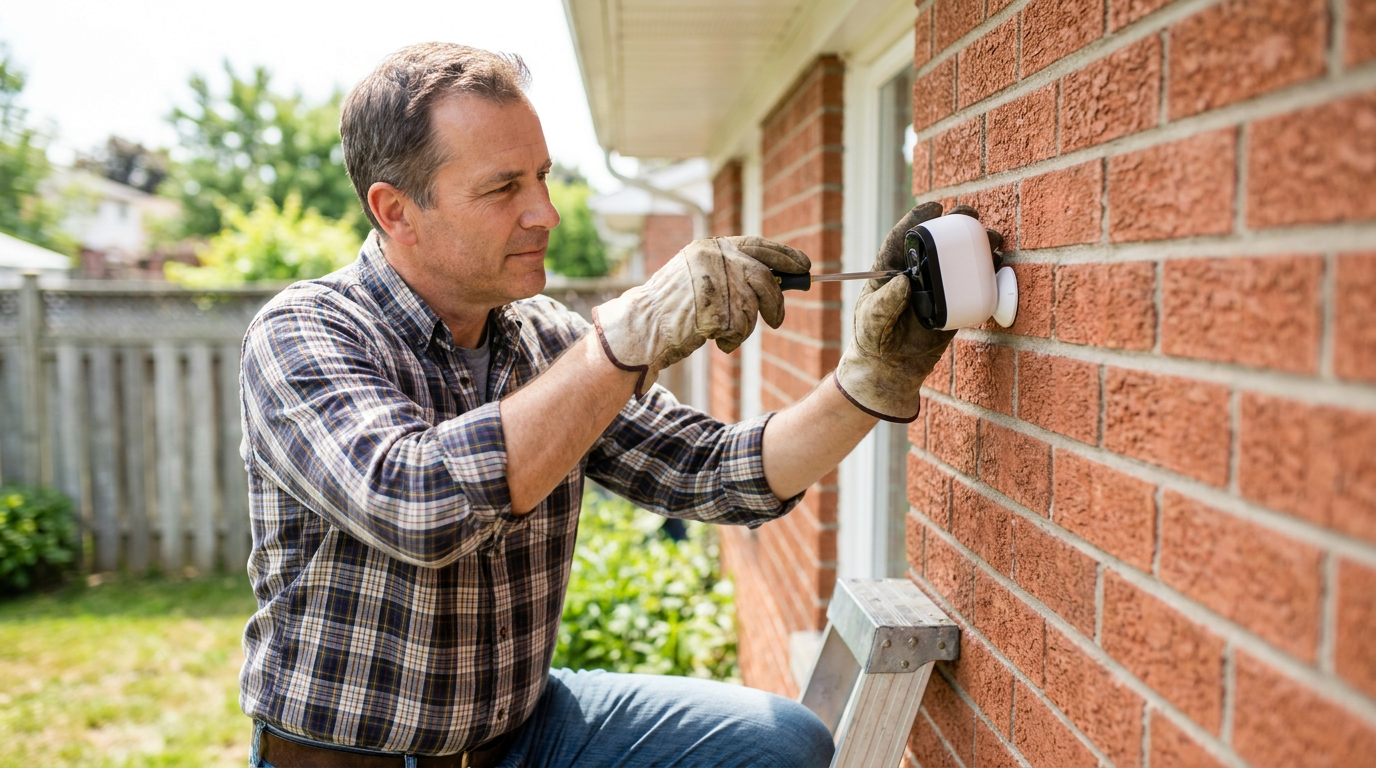
Mount it about eight to ten feet up, tilted slightly down, so it catches faces rather than the tops of hats — like hanging a mirror at the height people actually look into it. Before drilling, stand at the spot with your phone and check the Wi-Fi signal. Rain usually gets in through the cable hole, not the camera, so leave a drip loop (a dip in the cable so water runs off) and seal the hole. If a camera connects to your home’s mains electricity, switch off the breaker first and, if unsure, hire an electrician. Last, set motion zones and check that a clip really saves.
Cameras This Guide Applies To

A common wired install, with one of the highest ratings and deepest review bases we track, connecting to an existing outdoor fixture rather than a fresh electrical run. Motion-activated LED floodlights pair with 1080p color night video. Installation is a real project — turning off a breaker, working with existing wiring — and a meaningful share of buyers hire an electrician rather than work at a breaker panel themselves.
Why You Should Get This
If you’re installing a wired camera, this is the most review-validated example of what that installation actually involves.
| Resolution | 1080p HD |
| Field of view | 140° horizontal |
| Power | Hardwired, existing outdoor fixture |
| Night vision | Color night vision |
| Audio | Two-way talk |
| Siren | 105dB built-in siren |
| Lighting | Motion-activated LED floodlights |
| Smart home | Works with Alexa |
Benefits
- Highest-rated outdoor camera tracked on this site.
- Connects to an existing outdoor fixture.
- Never needs a battery recharge once installed.
Pros and Cons
- Massive, consistent review base.
- No ongoing recharge maintenance after install.
- Motion-activated floodlights double as a deterrent.
- Needs an existing wired fixture or electrician.
- Real installation project, not a 15-minute job.
- Recorded clip history needs a subscription.
Features
- Motion-activated LED floodlights.
- Hardwired install.
- Two-way talk.

A common battery install, with one of the deepest, highest-rated review bases we track, genuinely a fifteen-minute job with a bracket, a few screws and an app pairing. No wiring is needed at all. Its head-to-toe view shows the package on the mat once mounted at the right height.
Why You Should Get This
If you’re installing a battery camera, this is the most review-validated example of the simpler no-wiring install.
Benefits
- Deepest review base of any video doorbell tracked on this site.
- Genuine fifteen-minute install, no wiring.
- Head-to-toe view shows the whole doorstep.
Pros and Cons
- Largest, most trustworthy review base.
- No electrical work required.
- Motion zones cut sidewalk false alerts.
- Recorded clip history needs a subscription.
- 1080p rather than 2K.
- Mounting height still matters for a good frame.
Features
- Head-to-toe 1:1 view.
- Removable battery, no wiring.
- Two-way talk.

A complete wired PoE install, with a solid owner rating, the most involved installation covered on this page — running Ethernet cable to four camera positions and connecting them to an 8-channel NVR. It records 24/7 with no subscription once installed. Owners consistently describe this as a genuine weekend project rather than a quick job.
Why You Should Get This
If you’re installing a full multi-camera PoE system, this is the most review-validated example of what that larger project involves.
| Camera resolution | 4MP Super HD (2560x1440), 4 bullet cameras |
| NVR | 8-channel PoE NVR |
| Storage | 2TB HDD pre-installed, 24/7 recording |
| Connectivity | PoE, single cable per camera |
| Detection | Person and vehicle detection |
| Night vision | Infrared, up to 30m range |
Benefits
- Largest review base of any complete NVR system tracked on this site.
- One cable per camera carries both power and data.
- No subscription once installed.
Pros and Cons
- True 24/7 recording, not event clips only.
- No recurring cost after purchase.
- Deep, trustworthy review base.
- Real weekend project running four cable runs.
- 4MP rather than 4K resolution.
- Requires planning cable routes before starting.
Features
- Four 4MP PoE cameras.
- 8-channel NVR.
- 2TB HDD pre-installed.
The Step by Step Install at a Glance
The whole job, in the order it should happen. Each stage gets its own section below.
- Pick the position for face height, light direction and sight line — before any bracket comes out of the box.
- Match the power source to that position: battery, outdoor outlet, PoE cable or solar panel.
- Test the WiFi standing at the exact mounting spot, on the exact band the camera uses.
- Mount the bracket with the right fixing for the wall material, holes angled downward from outside.
- Seal the cable entry with a drip loop, a connector sleeve and exterior silicone.
- Finish the setup in the app — activity zones, detection type, and a verified test recording.
Steps three and six are the ones people skip, and they are the two that produce most of the one-star reviews in this category. Neither takes ten minutes.
Tools Needed Before You Start
Nothing exotic, but a missing item mid-job means a camera left hanging off a bracket overnight. For a battery, solar or plug-in installation: a cordless drill with a masonry or wood bit sized to the supplied wall plugs, a screwdriver, a tape measure, a pencil, a small spirit level and a stepladder tall enough that you are not reaching. Add exterior-grade silicone and a cloth for the wall penetration.
For a PoE run, add a cable-fishing rod or a length of stiff wire, an RJ45 crimper and tester if you are terminating your own ends, outdoor-rated conduit or clips, and a long drill bit for the wall pass-through. For a hardwired floodlight camera, add a non-contact voltage tester — that one is not optional — plus correctly sized wire connectors and an exterior-rated junction box if the existing one is not.
Two consumables worth buying at the same time as the camera: a high-endurance microSD card if the model takes one, and a spare battery pack if the model has a removable one. Both save a second trip up the ladder later.
Step 1: Choose the Position Before You Choose the Bracket
The direct answer: to install a security camera properly, mount it at eight to ten feet, the range Ring recommends for its outdoor cameras, angled down about ten to twenty degrees, positioned so faces enter the frame rather than passing under it. That eight-to-ten-foot mounting height is the single most-cited number in this whole guide because it decides whether footage is actually useful later.
Most disappointing footage is a mounting decision, not a camera decision. Cameras placed at gutter height under a soffit give a clean, wide, useless view of the tops of hats. Cameras placed low get covered, knocked or unplugged. The eight-to-ten-foot band keeps the lens out of casual reach while still catching a face at conversational distance.
Two more things to plan while you are still holding the camera rather than a drill. First, distance from the subject: facial detail falls off quickly with distance, so a face that is clear at ten to fifteen feet on a typical wide-angle 2K camera can become hard to identify much farther out. If the area you want to cover is bigger than that, you need either a closer camera or a spotlight and a higher-resolution sensor, not a wider lens. Second, what is behind the subject: a camera pointed at a bright sky or a west-facing wall at sunset will silhouette everyone in front of it. Aim so the light falls on faces rather than behind them.
Finally, check the sight line for obstructions that will exist later — a hedge in August, a wreath in December, a car parked in the drive. Owner reviews are full of cameras that worked perfectly for six weeks and then spent a season filming a shrub.
Step 2: Match the Power Source to the Position
This is where the install job actually gets decided, and each option has a very different amount of work attached.
Battery. The easiest install in the category: a mounting plate, three screws into a wall plug, snap the camera on, pair in the app. Twenty minutes, no wiring, no electrician, and it comes off cleanly when you move. The cost arrives later as the recharge cycle. Manufacturers quote months; owners in busy positions report weeks, because every motion event costs power. The FTC requires advertisers to have objective evidence — a “reasonable basis” — for claims like these, but treat the printed number as a best-case ceiling rather than a guarantee for your specific mounting spot. Mount a battery camera where a stepladder reaches easily, because you will be up there more often than the box implies. The category detail sits in wireless and battery cameras.
Plug-in wired. A camera on a standard outdoor outlet gets continuous power and never needs charging, which removes the biggest single frustration in the category. The constraint is obvious: you are tied to wherever an outlet exists, and running an extension cord outdoors permanently is neither safe nor weatherproof. If the position has an outlet under an eave, take it.
PoE. Power over Ethernet sends power and data down one Cat5e or Cat6 cable from a switch or recorder. It is the most reliable arrangement available to a homeowner — no battery, no WiFi congestion, no dropped uploads — and it is what professionals install. The cable itself is low voltage and safe to handle. The work is pulling it: through an attic, down a wall cavity, or along a soffit in outdoor-rated conduit. Budget an afternoon rather than half an hour, drill the wall penetration on a slight upward angle from outside so water cannot run in along the cable, and leave a service loop at the camera end. Full category in wired PoE cameras.
Solar. A battery camera with a panel attached, and the install adds one significant constraint: the panel needs genuine direct sun for several hours a day, which usually means it wants a different orientation from the camera. Most kits use a separate panel on its own bracket with a short cable for exactly this reason. In the northern hemisphere aim the panel south, tilt it, and keep it clear of the shade line that appears in winter when the sun sits lower. Owner reviews of solar cameras split almost perfectly along this axis — panels in real sun work, panels under a tree do not. See solar cameras.
Step 3: Test the WiFi Signal at the Exact Spot
Do this before you drill anything. It is the step that gets skipped most often and it causes more one-star reviews than any hardware fault in the category.
Stand where the camera will be mounted, holding a phone at that height, and check the signal strength on your home network. A camera streaming video needs far more headroom than a phone loading a web page, so a connection that feels usable in your hand can be marginal for continuous upload. If a speed test at the mounting point is struggling, the camera will drop clips, buffer live view, and appear offline for stretches — all of which owners routinely report as a broken camera.
Signal degrades hard through exterior walls, and worst through brick, stucco with metal lath, foil-backed insulation and anything with a metal screen. Two walls and fifty feet is a common recipe for failure at the back fence. The fixes, cheapest first: reposition the router, add a mesh node on the side of the house facing the camera, install an outdoor-rated access point, run Ethernet and switch to PoE, or drop the network entirely and use a cellular camera, which is what no-WiFi and cellular cameras exists for.
One more practical note: many cameras join only 2.4GHz networks, not 5GHz. If your router broadcasts both bands under one name, you may need to temporarily separate them to complete pairing. This is the single most common reason a new camera refuses to connect, and it is not a fault.
Step 4: Mount It Properly
The physical job, in order.
- Hold the camera up first and check the live view from the app before drilling. Sixty seconds here saves a second set of holes.
- Mark the holes with the bracket as a template. Do not eyeball it — a bracket a few degrees off is visible in every frame forever.
- Use the right fixing for the material. Wall plugs in masonry, a proper anchor in siding, and ideally a stud or solid batten behind vinyl, which will not hold a screw on its own.
- Drill downward-angled cable holes from the outside. Any hole that slopes inward becomes a water channel straight into the wall cavity.
- Tighten the ball joint firmly. A camera that gradually droops over a season is a classic complaint, and it is nearly always an under-tightened pivot.
Under an eave or soffit is the best outdoor position available in most homes: it is at the right height, it shelters the unit from direct rain, it shades the lens against glare, and it keeps the camera out of reach.
Step 5: Weatherproof the Cable Entry, Not the Camera
Outdoor cameras are weather-resistant out of the box — look for IP65 as a floor, IP66 or IP67 if the unit is fully exposed. The body is rarely the failure point. Water gets in at the connector and the wall penetration, and that part is your job.
Three habits cover it. Leave a drip loop: let the cable hang below the connector before it rises to the camera, so water runs off the low point instead of tracking into the plug. Use the supplied weatherproof connector sleeve or self-amalgamating tape over any joint that lives outdoors, including the RJ45 coupler on a PoE run. And seal the wall penetration with exterior-grade silicone from the outside, sloping the bead so it sheds water.
In freezing climates, add one more consideration: battery performance drops sharply below freezing, and lithium packs charge poorly in the cold. Owners in northern states consistently report shorter runtimes in January, which is normal physics rather than a defect — but it is a reason to favor a wired or PoE camera at a position you cannot easily reach in winter.
How to Install Security Camera Wiring: Safety at a Junction Box
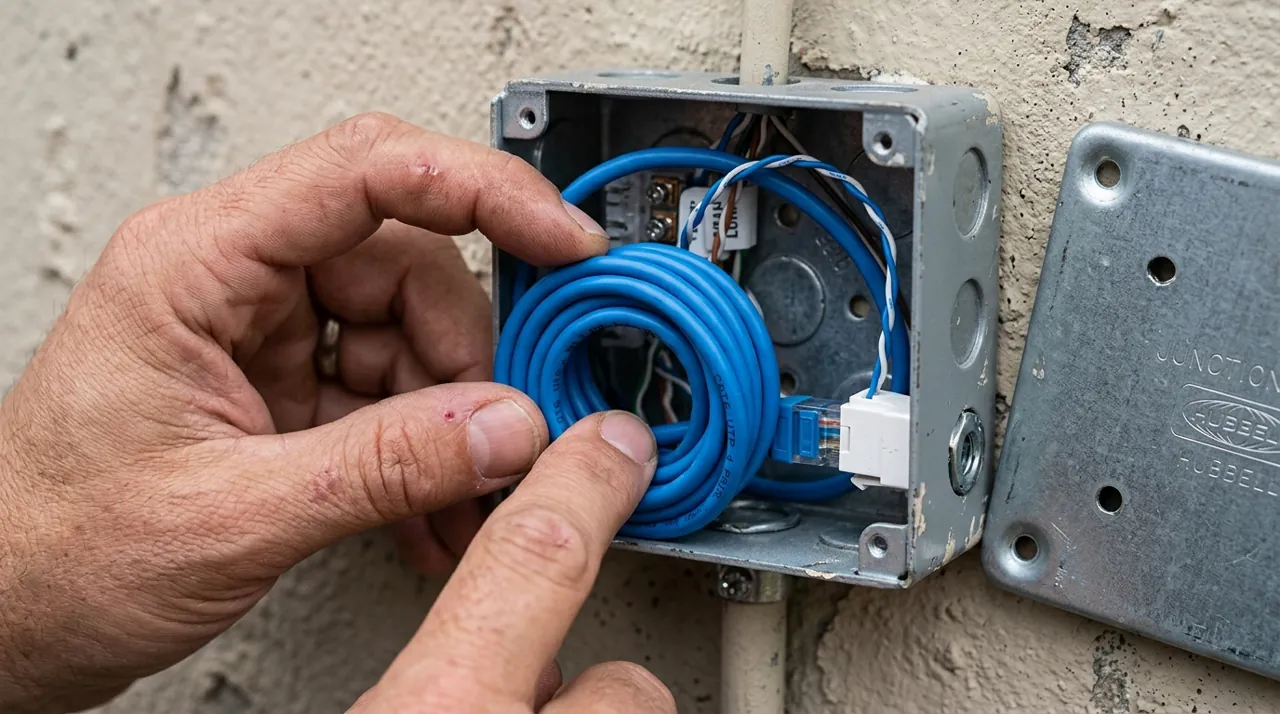
Battery, plug-in and PoE installs carry no meaningful electrical risk. Hardwired floodlight cameras do, because they connect to a junction box carrying household mains voltage.
If you are doing that job yourself: switch off the correct breaker, then verify the circuit is actually dead with a non-contact tester at the box — do not trust the label on the panel, which is wrong in a great many homes. Confirm the existing box is rated for the fixture weight and is an exterior-rated enclosure. Match conductors by color, cap them with correctly sized wire connectors, and ground the fixture. Never splice outdoors outside an enclosure.
If any of that reads as unfamiliar, hire a licensed electrician. It is typically a short, inexpensive call-out, and in some jurisdictions a new exterior fixture requires a permit or an inspection regardless. Check local requirements before you start rather than after.
Step 6: App Pairing and Setup Settings That Matter
Pair the camera before final mounting where the app allows it, close to the router, then move it into position. It saves standing on a ladder holding a phone.
Once it is live, three settings decide whether you keep the system.
Activity zones. Draw the detection area to exclude the sidewalk, the road and the neighbor’s driveway. This is the single highest-value five minutes in the whole install, because default settings alert on everything that moves and a camera that cries wolf gets muted.
Sensitivity and detection type. Turn on person detection if the camera offers it, and dial motion sensitivity down until wind and shadows stop triggering it. On several brands person detection is a subscription feature, which is worth knowing before you buy — see is Ring worth it for how that plays out on the biggest platform.
Storage. Confirm where recordings actually go, then test it. Walk in front of the camera, wait, and go find that clip. A surprising share of owners discover only during a real incident that nothing was ever being saved. If the camera uses a microSD card, buy a high-endurance card rated for continuous video — cheap unbranded cards are the most common cause of recordings that silently fail.
Install Accessories Worth Having on Hand

Best for angling a camera precisely under an eave or soffit during install.

Best for a clean, weatherproof cable entry point during a wired install.

Best for protecting exposed wiring on a dome-camera installation.
Common Mistakes Owners Report After Installation
- Mounted too high. The most common regret in the category. Faces need eight to ten feet, not the top of the gable.
- Pointed through a window. Night vision infrared bounces off glass and returns a white glare. If you must shoot through a window, turn IR off and rely on room light.
- No signal check first. Holes drilled, camera up, connection unusable. Test before you drill.
- Facing into the sun. An east or west aim washes out exactly the dawn and dusk hours you most want covered.
- Default motion settings left alone. Alert fatigue is the leading cause of a security system that quietly stops being used.
- Cable entry not sealed. The camera is IP65; the hole you drilled is not.
- Recording never verified. Test the whole chain once, on purpose, while nothing is happening.
Install Costs, Storage Options and Total Cost of Ownership
The install itself is usually free apart from consumables, and a DIY battery or plug-in job costs nothing beyond a few wall plugs. The two places money appears are the ones people forget to budget.
First, the labor exception. A hardwired floodlight camera at a junction box is commonly a short electrician call-out, and in some jurisdictions a new exterior fixture needs a permit or an inspection. A long PoE run through an attic is an afternoon of your time or a cabling call-out. Neither is expensive; both are surprises if unplanned.
Second, the storage options behind the camera. A microSD card is a modest one-off cost for a high-endurance model. A cloud plan is a recurring subscription cost — a modest monthly fee for one camera and more for a household across Ring, Arlo, Google Nest and Blink, while Eufy, Reolink, Wyze and TP-Link Tapo let you skip it by recording locally. Over five years the plan usually outweighs both the camera and the install, so the total cost of ownership is worth writing down before the first hole is drilled.
Warranty and Return Policy Notes
Do the signal test and the recording test while the camera is still returnable. Consumer cameras generally carry a one-year warranty, occasionally extended for as long as a subscription is active, which quietly links the hardware cover to the recurring bill. Keep the box and the packaging until the camera has run a full week in position, and check the seller return policy before mounting, because a camera that will not hold a usable connection at the spot you chose is a return, not a repair.
Which Camera to Buy Before You Install: A First-Time Buyer Note
If you have landed here before buying anything, the install job should shape the purchase rather than the other way round. Walk the position first. If there is an outdoor outlet under an eave, a plug-in camera removes the recharge problem for the price of a shorter shopping list. If the spot is twelve feet up at the back fence, a battery camera means a ladder trip every few weeks and solar becomes worth the premium. If you rent, nothing may be drilled and the answer is an indoor camera aimed at the entry.
That sequence — position, power, then product — is what our buying guides hub is built around, and the situational rankings in use-case guides pick up where it leaves off. A first-time buyer who chooses the mounting spot before the model almost never ends up installing the same camera twice.
More Install Accessories

Best for local recording set up correctly on day one of installation.

Best for powering one PoE camera during install with no NVR port nearby.
Going Deeper: Ladder Safety and Mains Wiring, by the Book
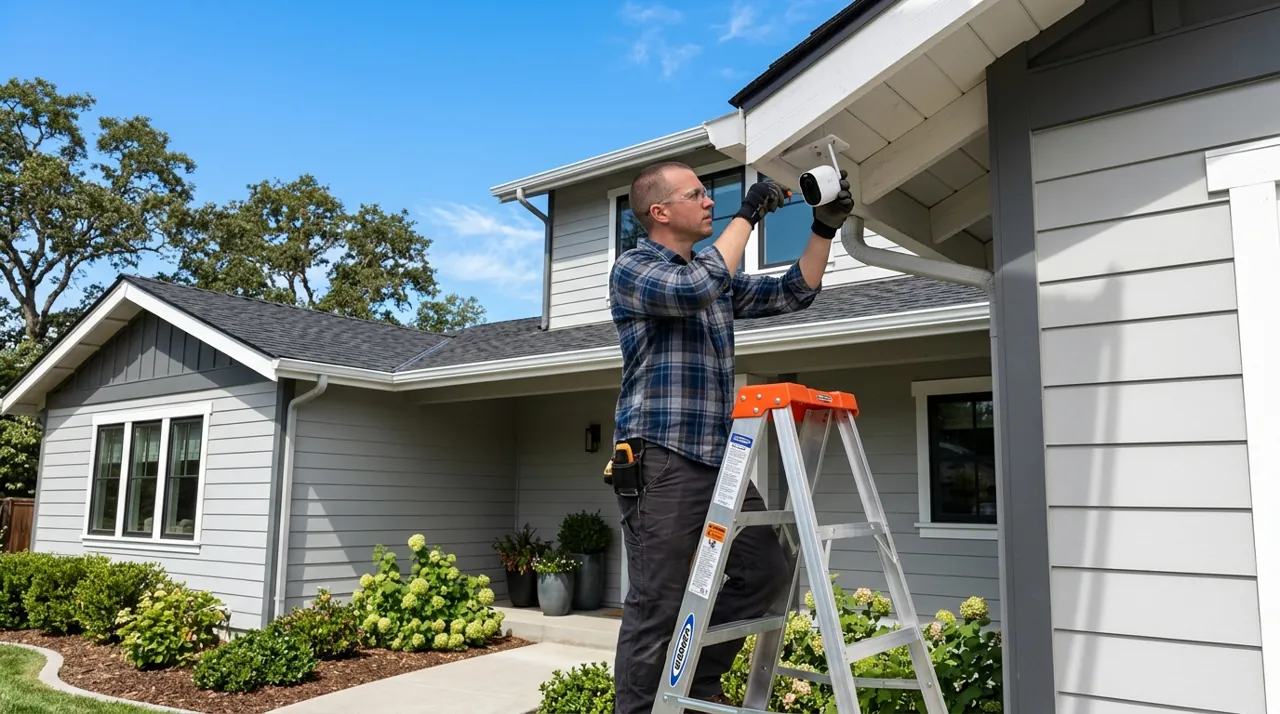
Most of the risk in a camera install is getting up to the mounting spot. OSHA’s portable ladder safety guidance says falls from portable ladders are one of the leading causes of occupational fatalities and injuries, and sets out the basics: keep three points of contact (two hands and a foot, or two feet and a hand) and face the ladder while climbing; use a ladder only on a stable, level surface; don’t use the top step of a stepladder unless it is designed for that; and never set a ladder on boxes, barrels or other unstable bases for extra height. It also warns to look for overhead power lines and to avoid metal ladders near energised electrical equipment.
Extension ladders have their own geometry. OSHA says the base should sit a quarter of the ladder’s working length from the wall, and that a ladder used to reach an elevated surface must extend at least 3 feet above the point of support, without standing on the top three rungs. Those rules matter at soffit and eave height, which is where the eight-to-ten-foot mounting position in this guide usually ends up on a single-story home, and higher on a two-story one.
Hardwired floodlight cameras add mains electricity. Ring’s Floodlight Cam Wired installation guide, as one manufacturer example, says to disconnect power at the circuit breaker or fuse box before starting, requires a 4-inch round, UL-listed weatherproof electrical box, and connects green ground, white neutral and black hot wires to their matching counterparts. It suggests weatherproof silicone caulk where the camera meets the box, and states that installation by a qualified electrician may be required in your area, pointing owners to local laws and building codes. On height, Ring’s positioning guide recommends 8 to 10 feet with a 20-degree tilt for its own outdoor cameras, close to the range this guide gives, so check your specific camera’s instructions before drilling.
After the Install
Give it a week, then revisit the settings. You will know by then which alerts are noise and which matter, and a second pass at the activity zones is usually what turns a merely working camera into one you actually rely on. Clean the lens every few months (Reolink suggests at least once every three months) — spider webs across an infrared lens are a genuinely common cause of blurred night footage — and check battery levels before you need them rather than after.
Adding more positions? Work through the situation-specific guides rather than buying another of the same camera: best security camera for front door for deliveries and visitors, best security camera for backyard for open ground, and best security camera for apartment if you are renting and nothing may be drilled at all. The whole situational set is indexed at use-case guides.
Sources & References
- Advertising FAQs: A Guide for Small Business — Federal Trade Commission
- Night Vision video quality is poor — Google Nest Help
- Understanding Ring Protect subscriptions — Ring
- Troubleshooting In-App Setup Issues for Ring Products — Ring
- How To Clean Security Camera Lens: A Thorough Guide — Reolink
- Portable Ladder Safety QuickCard — Occupational Safety and Health Administration
- Installing Floodlight Cam Wired Plus and Pro — Ring
- Positioning doorbells and security cameras — Ring