
Affiliate Disclosure: Some links on this page are affiliate links. As an Amazon Associate, we earn from qualifying purchases — at no extra cost to you. We do not buy, install, or physically handle the cameras we cover; our rankings come from aggregated owner reviews, ratings and expert consensus. Commissions never change our verdicts. We're reader-supported: commissions fund hosting, research and updates, so if a guide helped, buying through our links keeps it going. How we rank · full disclosure.
Short version: a dirty lens is one of the most common, most overlooked causes of disappointing camera footage, especially at night. Clean with a dry or slightly damp microfiber cloth, avoid ammonia-based cleaners, and check an outdoor camera every few months (Reolink suggests at least once every three months).
In Plain English
A dirty camera lens is one of the most common reasons for blurry footage, especially at night. Dust, pollen, water spots and spider webs can look harmless in daylight but make night video hazy or glowing.
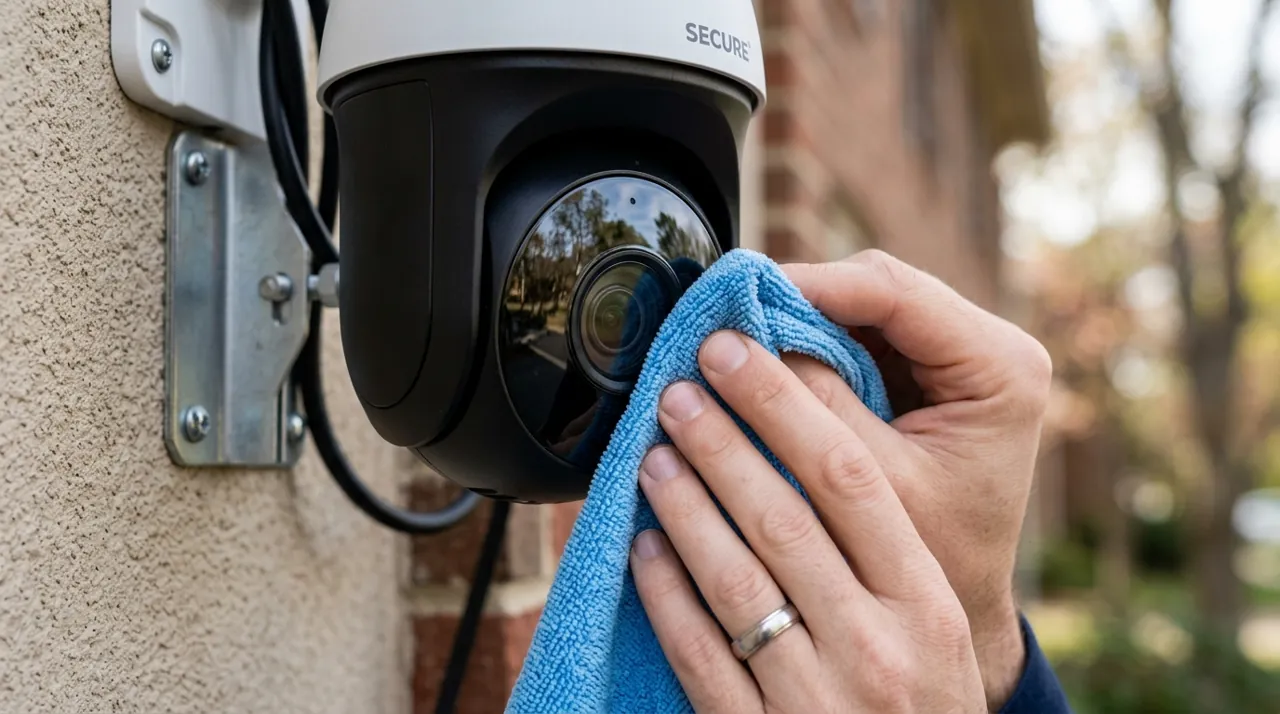
Cleaning is like wiping your glasses. First brush or blow away loose grit, so you don’t scratch the lens. Then wipe gently in circles with a soft microfiber cloth, dry or dampened with a little water. Put any liquid on the cloth, never on the camera, and skip ammonia glass cleaners and paper towels. At night, cameras use infrared light (light your eyes can’t see) to see in the dark, and dirt or a nearby wall can bounce it back into the lens as glare. Check outdoor cameras every few months, and use a steady ladder.
Security Camera Lens Types This Guide Applies To

The highest-rated Ring device tracked on this site with one of the highest ratings and deepest review bases we track, mounted outdoors where spider webs, pollen and rain spots are the most common causes of blurry footage.
Why You Should Get This
If this camera is showing blurry or hazy footage, a dirty lens is one of the most common, easiest fixes.
| Resolution | 1080p HD |
| Field of view | 140° horizontal |
| Power | Hardwired, existing outdoor fixture |
| Night vision | Color night vision |
| Audio | Two-way talk |
| Siren | 105dB built-in siren |
| Lighting | Motion-activated LED floodlights |
| Smart home | Works with Alexa |
Benefits
- Fixed outdoor mounting makes lens grime a common issue.
- Simple wipe-down restores image quality.
- No tools required for basic cleaning.
Pros and Cons
- Easy access for regular cleaning.
- Restores image quality in minutes.
- No subscription needed for the fix itself.
- Outdoor mounting means it needs cleaning more often than an indoor camera.
- Height can make access harder on some installs.
- Spider webs near IR LEDs cause night-time false alerts.
Features
- Motion-activated LED floodlights.
- 105dB built-in siren.
- Two-way talk.

A common outdoor camera exposed to the same weather and debris issues, with a solid owner rating. Its compact housing has a small lens that collects dust and water spots quickly in exposed positions.
Why You Should Get This
If this camera is showing dim or spotty night footage, check the lens for grime before assuming a hardware issue.
| Resolution | 1080p HD (1920x1080) |
| Field of view | 143° |
| Power | 2x AA lithium batteries, up to 2-year life |
| Night vision | Infrared |
| Audio | Two-way audio |
| Install | Wireless, wall-mount bracket |
Benefits
- Compact lens benefits from regular gentle cleaning.
- Weather-resistant housing tolerates cleaning wipes.
- Simple fix for image quality issues.
Pros and Cons
- Quick, tool-free cleaning process.
- Restores night-vision clarity.
- No subscription needed for the fix.
- Small lens size makes debris more noticeable.
- Battery removal recommended before cleaning.
- 1080p resolution shows grime more than higher-res cameras.
Features
- Two-year rated battery life.
- 1080p HD video.
- Weather-resistant mounting.
Why Lens Cleanliness Matters: Night Vision Haze
Dust, pollen, water spots and especially spider webs across an infrared lens are a genuinely common cause of blurred or glowing night footage that owners often mistake for a hardware fault. A layer of residue that’s invisible or barely noticeable in daylight can scatter infrared light dramatically at night, producing a hazy image or a glowing halo effect. If night footage looks meaningfully worse than day footage from the same camera, check the lens before assuming anything else is wrong.
How to Clean It, Step by Step
- Power down or cover the lens if practical — not strictly necessary, but reduces the chance of triggering unnecessary motion alerts mid-cleaning.
- Remove loose debris first with a soft brush or a gentle blast of compressed air, before anything touches the lens surface directly — this avoids grinding grit into the lens with a cloth.
- Use a dry microfiber cloth for light dust. For residue that won’t lift dry, lightly dampen the cloth with plain water (or a lens-cleaning solution only if your camera’s maker allows it — Arlo, for one, advises against chemical cleaners) — never spray liquid directly onto the camera.
- Wipe in gentle circular motions rather than back-and-forth scrubbing, which is less likely to grind in any remaining grit.
- Let it air dry fully before restoring power if you removed it, and do a quick live-view check afterward to confirm the improvement.
What to Avoid: Ammonia and Scratches
Ammonia-based glass cleaners can degrade certain lens coatings with repeated use — the same reasoning that applies to eyeglasses and camera equipment generally applies here.
Paper towels or rough cloths can leave micro-scratches over time; stick to a proper microfiber cloth.
Spraying liquid directly onto the camera risks moisture getting into seams or vents, particularly on a camera that isn’t rated for that level of exposure. Apply liquid to the cloth, not the camera.
Tools You Actually Need
Most of this job needs almost nothing. A clean microfiber cloth (the kind sold for eyeglasses or camera lenses works fine), a soft-bristle brush or a can of compressed air for loose debris, and plain water (or a lens-cleaning solution, if your camera's manufacturer permits one) for anything that won't lift dry. A stepladder is the only other common requirement, since most outdoor cameras are mounted higher than arm's reach on purpose. Avoid paper towels, tissues and any cloth with a rough weave, since all three can leave fine scratches on a lens over repeated use even when they look harmless in the moment.
Cleaning a Camera Mounted High Up With a Ladder
A camera mounted under an eave or on a second-story wall is deliberately out of easy reach, which is good for tamper resistance but means cleaning it safely takes a bit of planning. Use a stable ladder rated for your weight, have someone hold it or spot you if the position is awkward, and never lean or overreach to save a trip up and down. If a position is genuinely hard to reach safely, an extendable microfiber duster designed for high windows is a reasonable alternative to climbing at all, though it gives you less control than cleaning by hand. Skip any cleaning attempt in wet or icy conditions, since a slip risk outweighs a slightly dirty lens every time.
Dome Cameras vs. Bullet Cameras: Slightly Different Approach
A dome camera has a curved plastic or glass cover over the entire lens assembly, and that cover is what actually needs cleaning — wipe the whole dome surface, not just the small area directly over the lens, since haze anywhere on the dome scatters light across the image. A bullet or cylindrical camera usually has a smaller, more exposed lens with less material between your cloth and the actual sensor optics, so slightly gentler pressure is worth using since there's less protective cover between the cloth and the lens itself.
Cleaned It, But Footage Is Still Blurry: Check Condensation and Focus
If a thorough cleaning doesn't resolve the issue, the cause is probably not the lens. If only night footage is washed out, check whether infrared light is bouncing back off a nearby wall, eave or window — Google Nest and Reolink both name IR reflection as a leading cause of poor night vision. Check for condensation inside the housing on a camera with a compromised seal, which shows as persistent internal haze no amount of external wiping fixes. Check the camera's focus settings if it has a manually adjustable lens, since a lens can be knocked slightly out of focus during mounting or cleaning itself. And check the camera's resolution and age against current expectations — a several-year-old 720p camera will look soft compared to a modern 2K or 4K model regardless of how clean the lens is.
Beyond the Lens: The Rest of the Housing
Spider webs around (not just on) the camera are worth clearing too — beyond blocking infrared light directly, they’re a common trigger for false motion alerts as they move in the wind. Wipe down the housing itself periodically to prevent dirt or algae buildup that can, over a long enough time, degrade seals on a lower-quality camera.
Seasonal Considerations
Spring is peak season for pollen buildup on outdoor lenses in many regions. Fall brings spider webs and falling debris. Winter can bring snow or ice directly on the lens — see our security camera winter care guide for that specific scenario. A seasonal check aligned to these patterns catches most issues before they become a real problem.
Accessories Worth Having on Hand

Best for a mount that swivels down for easier lens access during cleaning.

Best for confirming footage clarity improved after a lens clean.
Building Cleaning Into Your Routine
The households that never deal with a mysteriously blurry camera are almost always the ones who tied lens cleaning to something they already do regularly, rather than treating it as a separate task to remember. Pairing it with a seasonal gutter clean, a spring exterior wash, or a fall yard cleanup means the camera gets checked on a schedule you're already keeping, instead of only after footage has already turned out disappointing when it mattered.
Going Deeper: Why a Little Dirt Ruins Night Footage
At night most cameras light the scene themselves with infrared LEDs, and the lens then has to receive that light back cleanly. Google’s Nest guidance says night vision issues are usually caused by infrared light reflecting off nearby surfaces such as shelves, windows or walls, and lists the signs: a large light or dark ring in the video, or part of the picture bright white or washed out, typically at one side. It also says dust, thumbprints and dirt can cause poor image quality, and recommends a soft cloth made for cleaning optics.
Reolink’s night vision troubleshooting names the same culprits: infrared light reflected by a wall causing overexposure, dust and debris including spider webs on the lens or inside a dome cover, and a dome camera’s own base blocking the infrared lights when the lens is angled badly. Its fixes are to reposition the camera away from walls and reflective surfaces, clean the lens, and adjust the dome’s lens angle. Cleaning and placement go together: a spotless lens will still glare if an eave or wall sits right in front of it.
The cleaning rules exist to protect the lens coating. Arlo’s cleaning guide says most camera lenses have a special coating that chemical cleaners can wear off, so it advises sticking to water, with a single drop of dish soap for stubborn residue, avoiding paper towels because they can scratch, and wiping in smooth circles starting from the center. Reaching the camera safely matters as much. OSHA’s portable ladder safety guidance advises keeping three points of contact while climbing, using a ladder only on a stable, level surface, not standing on a stepladder’s top step unless it is designed for that, and setting an extension ladder’s base a quarter of its working length from the wall.
Related Guides
See how to install a security camera for original mounting and weatherproofing guidance, and stop security camera false alerts if webs or debris are triggering unwanted notifications.
Sources & References
- How To Clean Security Cameras — Arlo
- How To Clean Security Camera Lens: A Thorough Guide — Reolink
- Reolink Camera Night Vision Blurry — Reolink Support
- Night Vision video quality is poor — Google Nest Help
- Portable Ladder Safety QuickCard — Occupational Safety and Health Administration