
Affiliate Disclosure: Some links on this page are affiliate links. As an Amazon Associate, we earn from qualifying purchases — at no extra cost to you. We do not buy, install, or physically handle the cameras we cover; our rankings come from aggregated owner reviews, ratings and expert consensus. Commissions never change our verdicts. We're reader-supported: commissions fund hosting, research and updates, so if a guide helped, buying through our links keeps it going. How we rank · full disclosure.
Short version: most cameras ship with an adequate bracket, so a separate mount is worth buying for a specific reason — a corner or pole install the stock bracket cannot handle, a brand-matched fit, or a weatherproof junction box to protect cable connections. The universal J-type dome bracket is the broadest-compatibility option here. Reolink owners get a first-party fit with the REOLINK RLA-JBL1 junction box. Installing several bullet cameras at once, the 3-pack junction box mount is the lowest per-unit cost on this page.
In Plain English
Most cameras come with a bracket that works on a flat wall. You only need a separate mount when that bracket doesn’t suit the spot, such as a corner, a pole or an angle the stock bracket can’t reach.
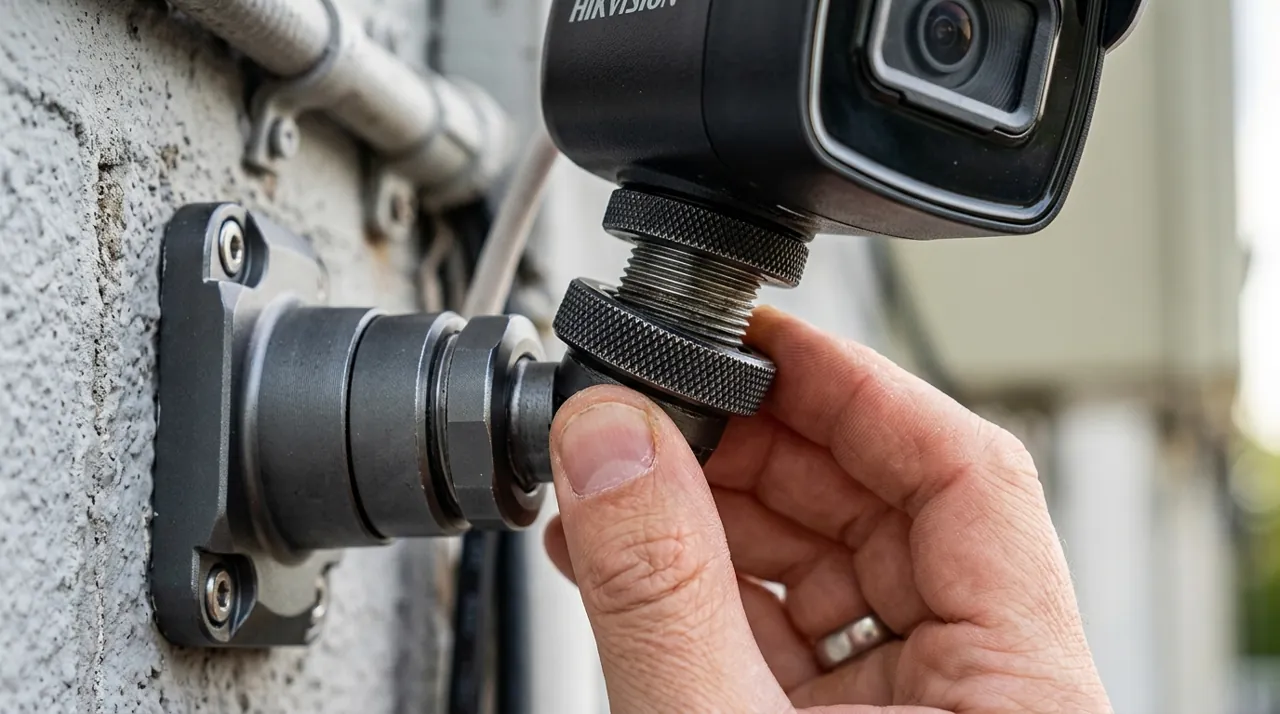
There are two kinds of mount. A bracket is like a shelf bracket: it simply holds the camera in place. A junction box (a small sealed box the camera sits on, with the cable connection tucked inside) also acts like a raincoat for the connection. That matters outdoors, because the cable joint is where water most often gets in over the years.
Height matters as much as hardware. Ring and Reolink suggest eight to ten feet up, tilted slightly down. That is high enough to be hard to tamper with and low enough to catch faces clearly.
The one thing to do: check whether your camera is dome or bullet shaped and what your wall is made of, then pick a mount and anchors to match both.
Top Rated Picks at a Glance
The Ranked Field: Star Rating, Consensus and Price

Best for mounting a dome-style camera to a wall or corner the original bracket does not fit.
- J-type bracket adjustable across a 15.7-23.6 inch range.
- Fits most standard dome security and IP cameras.
- All-metal construction rated for outdoor exposure.
- Simple two-screw wall or corner installation.
Why buy it: The most broadly compatible mount here — a genuine fix for a camera that shipped with a bracket that will not sit right on your actual wall, pole or corner.

Best for Reolink dome cameras that need clean, weatherproof cable routing at the mounting point.
- Purpose-built for Reolink dome camera mounting.
- Routes and protects cabling inside a sealed junction box.
- Weatherproof housing for permanent outdoor installation.
- Matches Reolink’s mounting hole pattern exactly.
Why buy it: A first-party fit for Reolink dome cameras specifically — no guessing whether hole spacing or cable routing will line up.

Best for installing several bullet cameras at once and wanting weatherproof junction boxes at each position.
- Three junction box mounts in one purchase.
- Rainproof plastic enclosure for indoor or outdoor cable connections.
- Fits standard bullet-style IP and CCTV cameras.
- Lowest per-unit cost on this page for a multi-camera job.
Why buy it: The lowest star rating on this page, but the practical value pick for anyone mounting three or more bullet cameras and needing junction boxes at every position.
Comparison Table
| Product | Best for | Buy |
|---|---|---|
| Universal Dome Camera Wall Mount Bracket (J-Type) | Best Overall | Price |
| REOLINK Junction Box RLA-JBL1 | Best for Reolink Cameras | Price |
| Universal Bullet Camera Junction Box Mount (3-Pack) | Best Value / Multi-Camera Install | Price |
How We Rank
We do not buy or physically install these mounts. Every star rating and review count comes from licensed Amazon data, weighted by review volume. Full method on how we rank.
Buying Guide: Choosing the Right Mount
Match the Mount Type to the Camera
Dome cameras and bullet cameras use different mounting styles, and buying the wrong type usually means it simply will not fit. Check whether your camera is dome-style (rounded housing, typically ceiling or wall mounted flush) or bullet-style (cylindrical housing, typically wall mounted at an angle) before choosing a mount.
Consider the Surface
A flat wall is the easiest install and the case most stock brackets already cover. Corners, poles, soffits and eaves each need a bracket designed for that specific geometry — an adjustable J-type bracket like the top pick here handles a wide range without needing a separate purchase for each surface type.
Weatherproofing at the Connection Point
For any outdoor wired camera, the cable connection is the most common point of water ingress over time. A junction-box-style mount seals that connection inside a weatherproof housing rather than leaving it exposed under a wrap of electrical tape, which is worth the small extra cost for a permanent outdoor install.
Buying for Multiple Cameras
Installing three or more cameras in one project changes the economics — a multi-pack junction box mount brings the per-unit cost down meaningfully compared to buying single mounts one at a time, and standardizing on one mount type across the install simplifies both the job and future maintenance.
Installation Tools You'll Actually Need
Most camera mounts install with a basic set of tools. A drill for the mounting screws. The anchors included with the mount, or masonry anchors for brick or stucco. A screwdriver. A stud finder is worth using on wood siding, to hit solid framing rather than relying on the anchor alone to hold the camera's weight. For brick, concrete or stucco, use a masonry drill bit rated for that surface — it avoids cracking around the hole, where a standard wood or metal bit will struggle and can damage the surface. Check the mount's included hardware against your specific wall material before starting. Not every mount ships with anchors suited to every surface type.
Cable Management at the Mount Point
For a wired camera, how the cable exits the mount matters as much as the mount itself. A junction-box-style mount routes the cable through a sealed entry point. That keeps water out of the connector over years of outdoor exposure. A simple bracket mount, by contrast, usually means the cable runs externally to the connection point. That needs its own weatherproofing — a dedicated outdoor-rated junction box, or at minimum a weatherproof tape wrap, if a junction-box mount isn't part of the setup. Plan the cable route before drilling. It avoids an awkward run across a visible section of siding or trim.
Mounting Height and Angle for Effective Coverage
Eight to ten feet off the ground is the range manufacturers such as Ring and Reolink recommend for an outdoor camera, and Ring pairs it with a slight downward tilt of about 20 degrees. That's high enough to sit out of easy reach for tampering. It's low enough that faces and license plates stay clearly identifiable, rather than shot from an awkward downward angle that only captures the top of someone's head. A steep downward tilt from a very high mount trades tamper resistance for identification quality. Identification is usually the more important job for a home security camera. An adjustable J-type bracket, like the top pick on this page, makes fine-tuning that angle after installation straightforward. That beats committing to a fixed angle set by the camera's stock mounting point.
Matching Mount Height to Camera Type
A doorbell camera is fixed near door height by its function — Ring recommends about 48 inches off the ground. It doesn't benefit from this guidance the same way. A driveway or entry camera benefits most from the eight-to-ten-foot range described above. A camera specifically covering a gate or a package-delivery spot may sit lower, closer to eye level, if identifying a face at close range matters more than covering a wide area. Check best security camera for front door for placement guidance specific to that position.
Mounting on a Pole, Fence Post or Corner
A flat wall is the easiest surface, but plenty of good camera positions aren't flat walls at all. A fence post. A freestanding pole covering a driveway entrance. An outside corner where two walls meet. An adjustable J-type bracket like the top pick handles a corner reasonably well, since its range covers slightly non-flat angles. A genuinely round pole or post usually needs a purpose-built pole-mount adapter instead of a standard flat-back bracket. Check the mount listing specifically for pole-mount compatibility if that's your install surface. Not every universal bracket is designed to wrap or clamp around a curved surface the way a flat-wall bracket is.
Going Deeper: What an IP Rating Does and Doesn’t Tell You
Mount and camera listings often quote an IP rating such as IP65 or IP66. The code comes from the international standard IEC 60529, adopted in the US as ANSI/IEC 60529 and published by NEMA. The standard classifies how well an enclosure protects against two things: access to hazardous parts and the entry of solid objects, shown by the first digit, and the entry of water, shown by the second.
Each digit maps to a specific test. For the first digit, levels 5 and 6 are checked with a dust test. For the second digit, level 4 covers splashing water, tested with an oscillating tube or spray nozzle, level 5 uses water jets from a 6.3mm nozzle, and level 6 uses a larger 12.5mm nozzle. Level 7 covers temporary immersion between 0.15m and 1m. So a higher second digit means the enclosure passed a tougher water test. It is not a vague promise of being “weatherproof”.
The more useful point for installers is that a rating applies to the part that was tested. The standard’s own introduction gives the example of a component rated only IP20 sitting inside an overall enclosure rated IP43, which protects against solid objects and splashing water. A camera housing rated IP66 says nothing about the cable joint hanging out of its back. That joint is exactly what a junction box is meant to protect.
The standard also describes itself as a horizontal standard, not a product standard, meaning it defines the tests while each product’s own standard decides how they apply. In practice, treat an IP rating as a useful comparison between enclosures of the same kind. Then make sure the whole outdoor path, including connectors, sits inside something rated for the weather it will see.
Related Guides
Mounts pair naturally with a proper power setup — see best PoE switches for security cameras for wired installs, or best solar panels for battery cameras going up on the same trip. For the full install process, see how to install a security camera.
The Verdict
For most installs, the universal J-type dome bracket is the right first purchase — it is the broadest-fitting option here and handles corners and awkward angles where a stock bracket usually falls short, though a round pole still calls for a clamp-style pole mount. Reolink owners should buy the matched RLA-JBL1 junction box rather than risk a universal fit, after checking their model is on Reolink’s compatibility list. And for anyone mounting several bullet cameras in one project, the 3-pack junction box mount is the practical, lowest-cost way to weatherproof every connection point.
Sources & References
- Positioning doorbells and security cameras — Ring
- ANSI/IEC 60529-2004 Degrees of Protection Provided by Enclosures (IP Code) — NEMA
- Reolink Junction Box RLA-JBL1 Installation Guide — Reolink
- Reolink Camera Mount Guide: Installation Tips for Secure Setup — Reolink
- Security Camera Pole Mount: Types and Installation Guide — Reolink